
10 Figma Hacks to Make Your Workflow More Efficient
Last year, we fully switched from Sketch to Figma. Since then, we’ve settled in and absolutely love it. This article will be useful for both newcomers and experienced users alike.
1. Create a Page Structure
For smaller projects, we keep everything in one file — drafts, concepts, and final mockups with components. To help developers and clients understand where the final design is and where the conceptual drafts live, we divide the file into pages.
We break the page list into sections. To make it easier to scan, we use emojis and add spaces at the beginning of page names to imitate hierarchy.
Technically, this “structure” is just a visual trick — Figma doesn’t allow nesting pages. So, we use empty pages as section dividers.
Here are a few examples of such a structure:
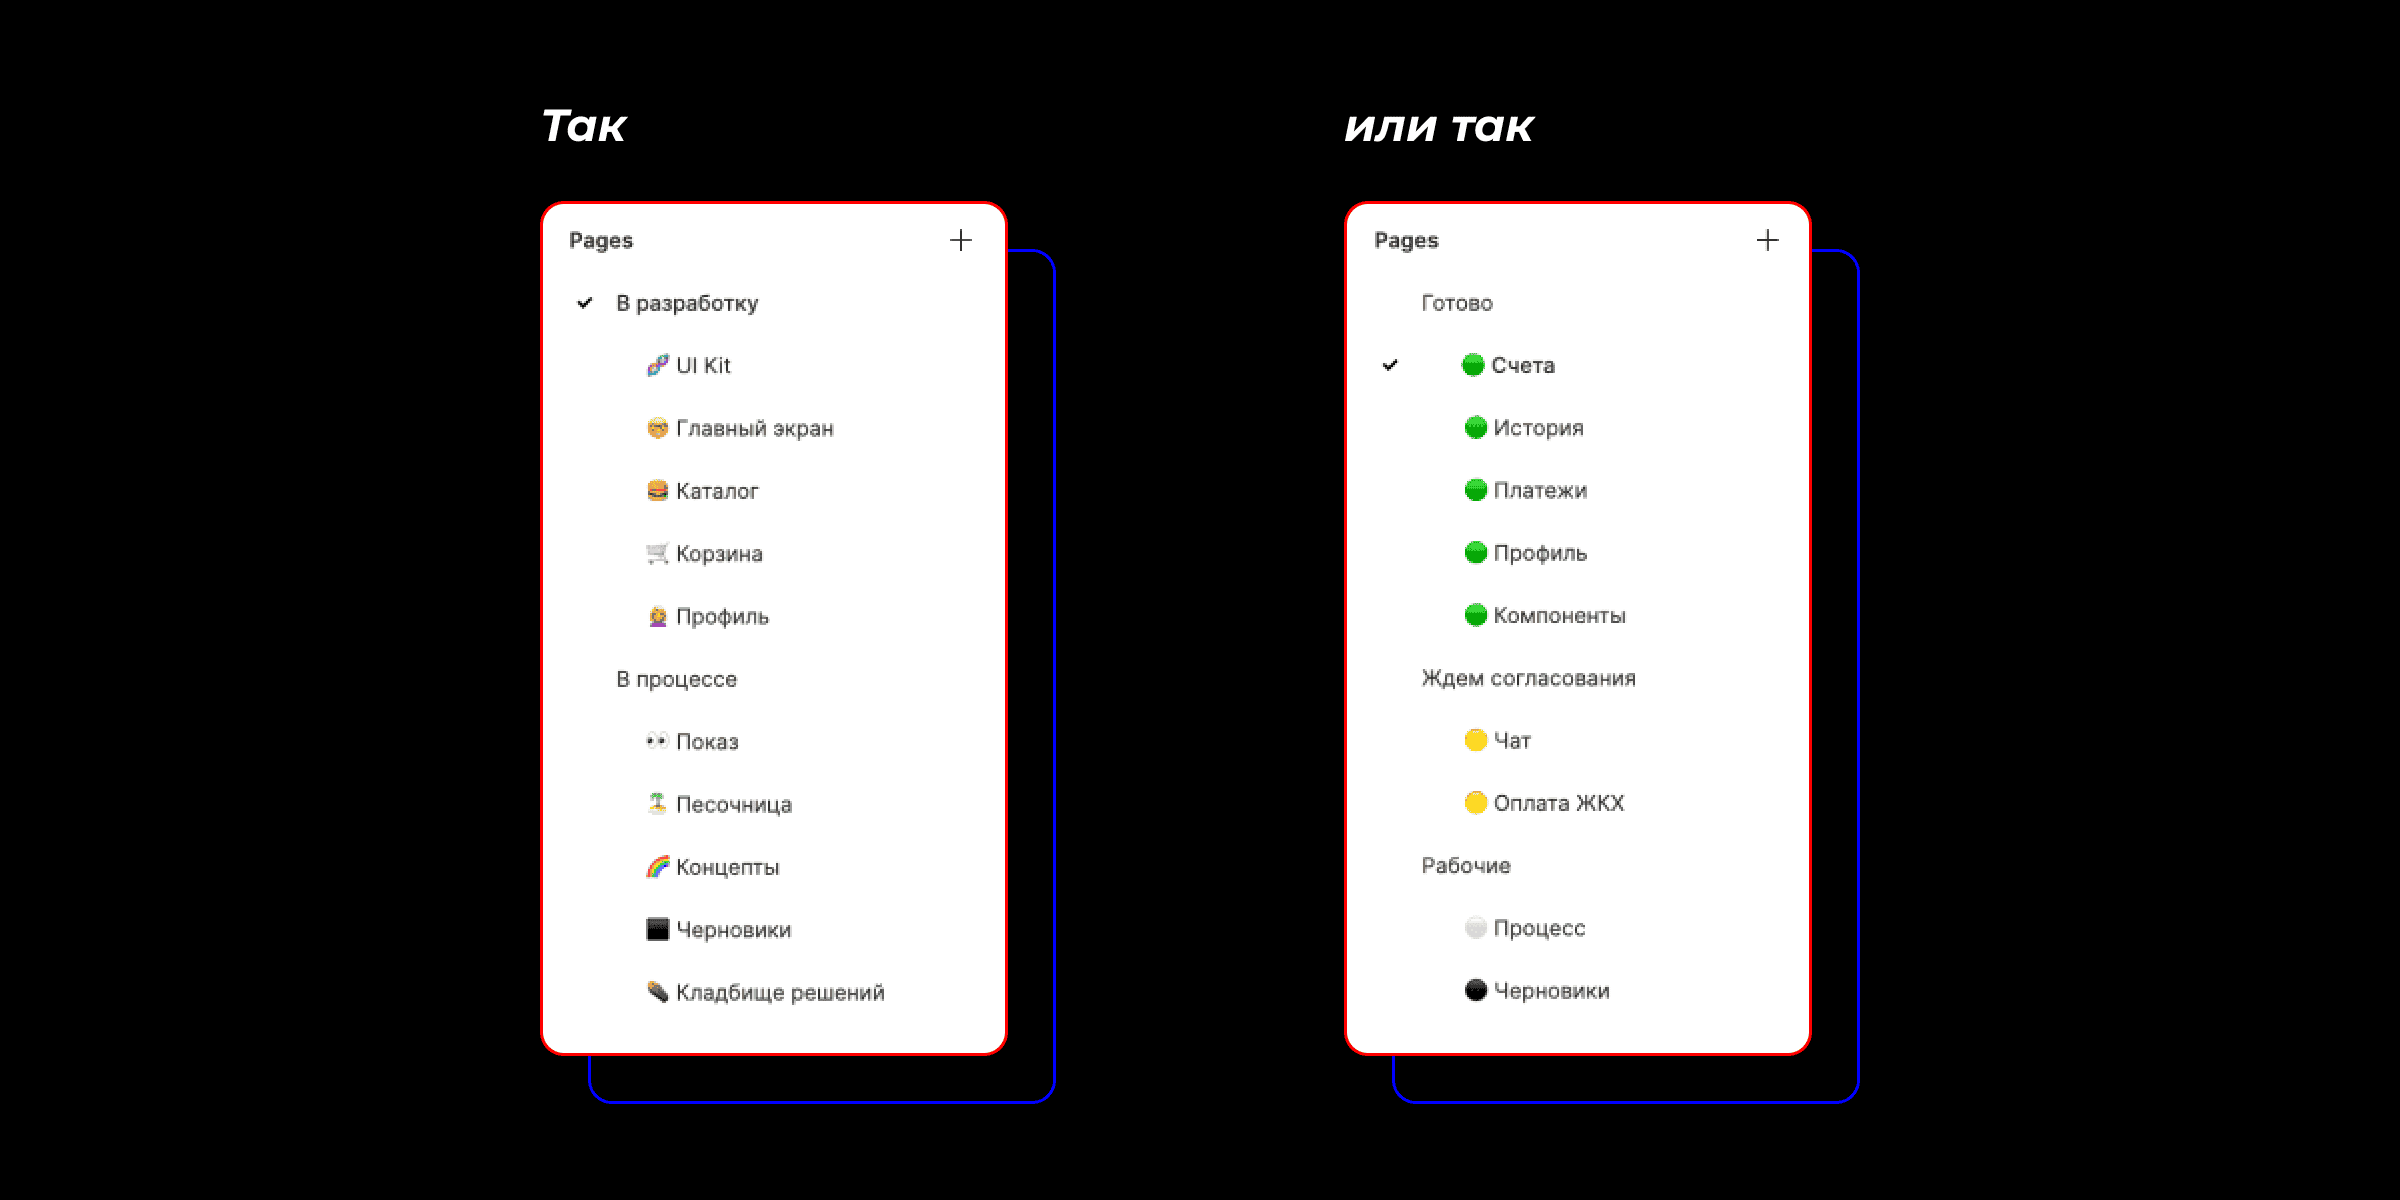 Using emojis like 🟢 or 🟠, you can also indicate the readiness of a section before handing it
over to development.
Using emojis like 🟢 or 🟠, you can also indicate the readiness of a section before handing it
over to development.
2. Use Identical Layer Names for Connected Components
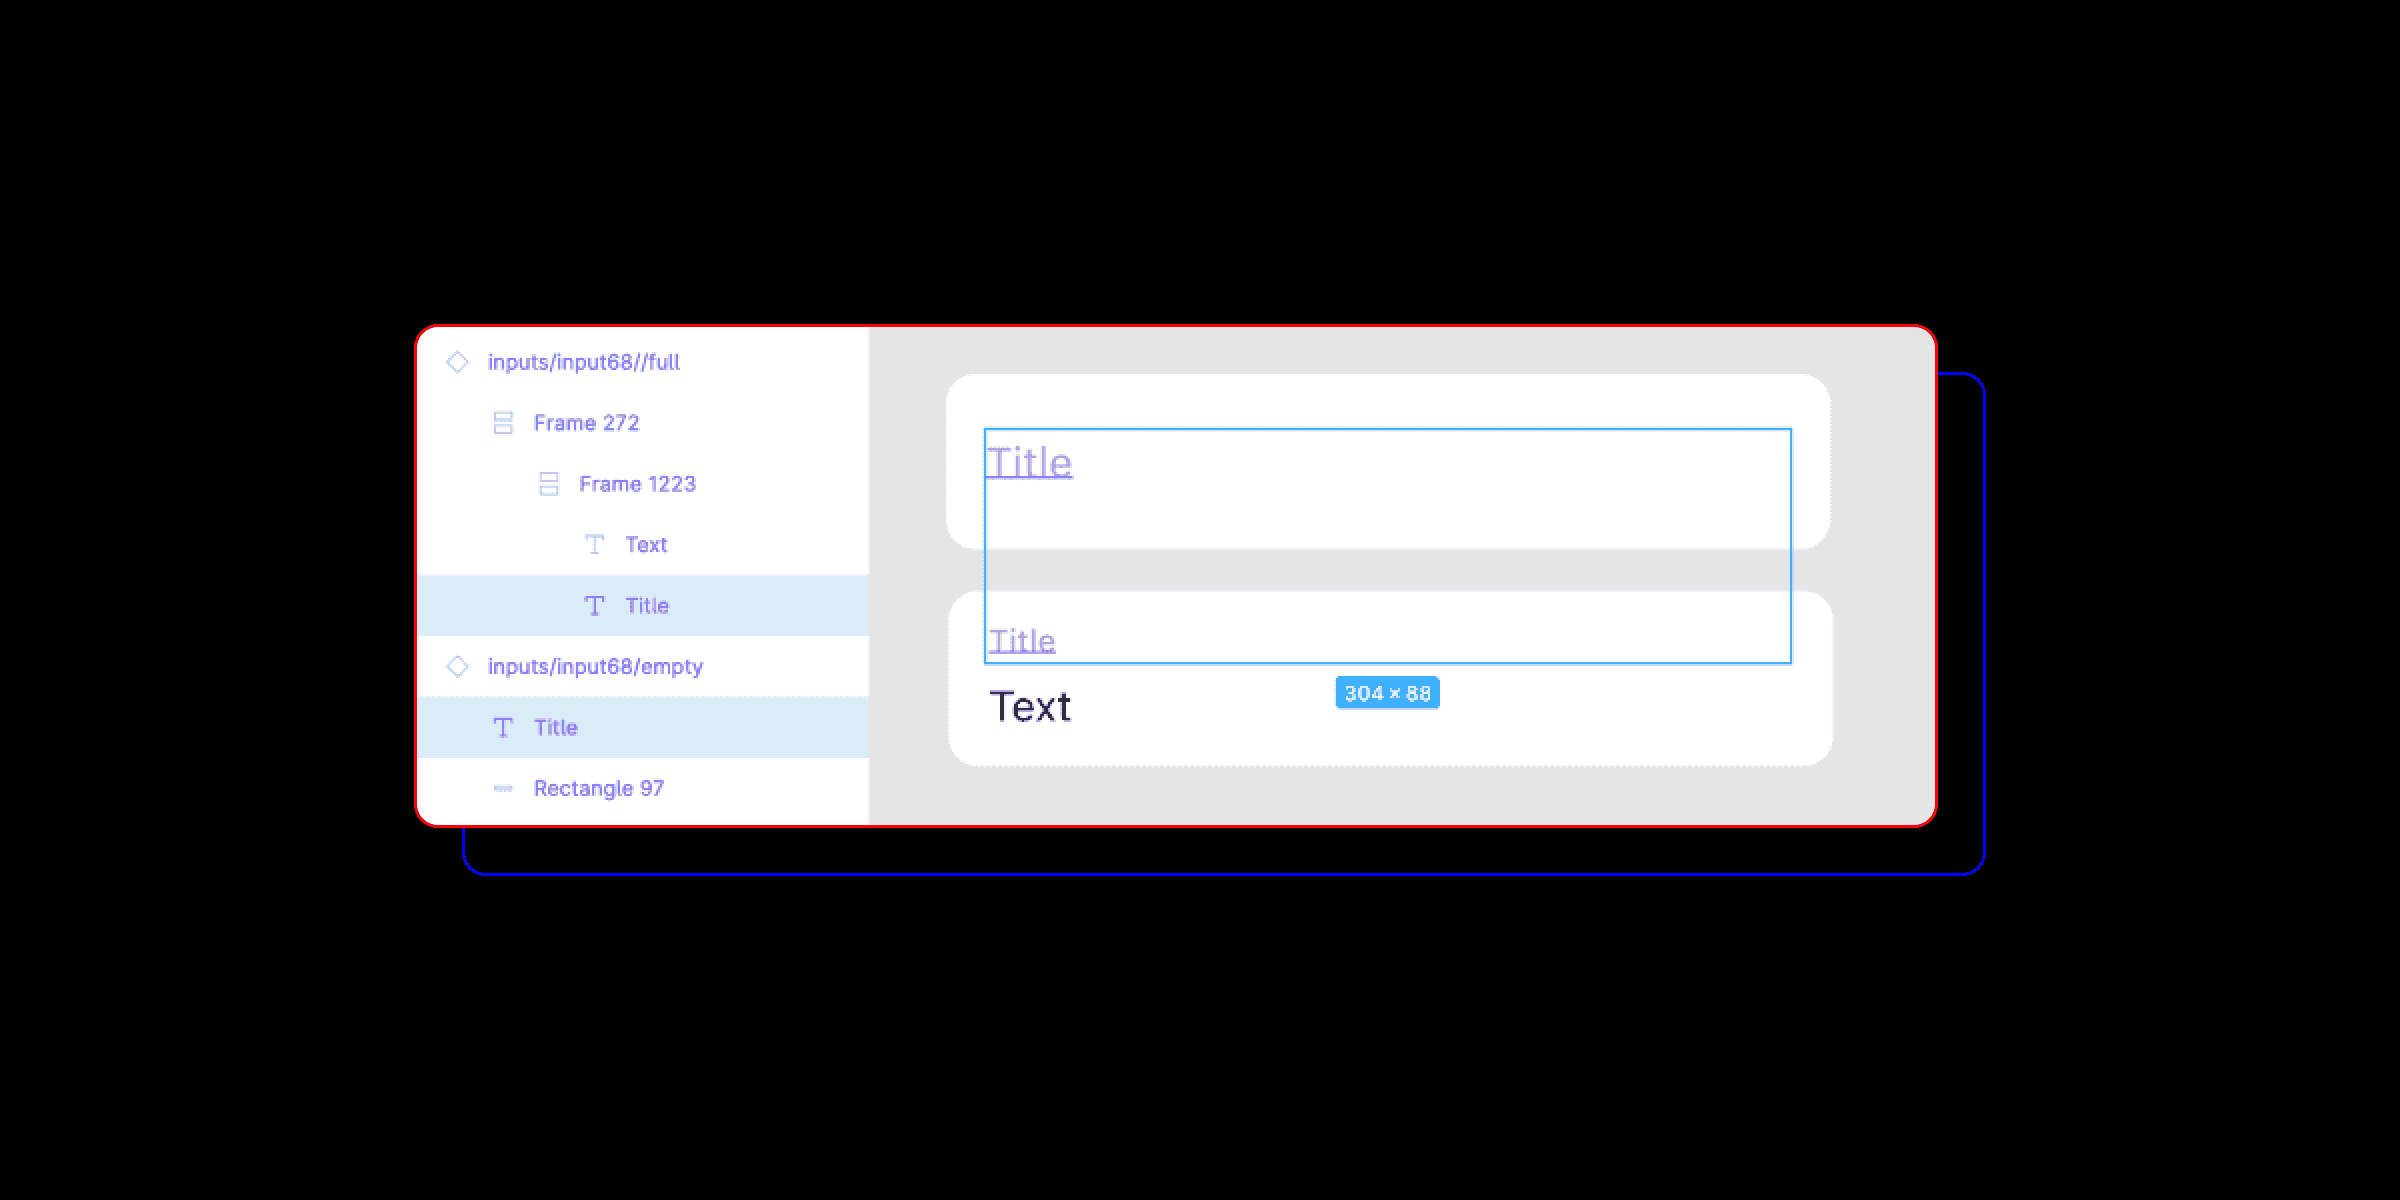
To preserve text when switching between component states, text layers in both components must have
identical names. This is especially useful for buttons, list items, and input fields.
For example, when switching an input from its default state to focus state, the label “Address” moves upward without losing its name.
To make it work, make sure the text layers are named the same way — for instance, “Title” and
“Title,” as shown below.
3. Save All Images as Color Styles
If you often use logos, flags, or avatars as fills, it’s handy to store them as color styles. This
way, you can quickly apply them to any shape without re-uploading images.

4. Quickly Find All Elements with Similar Properties
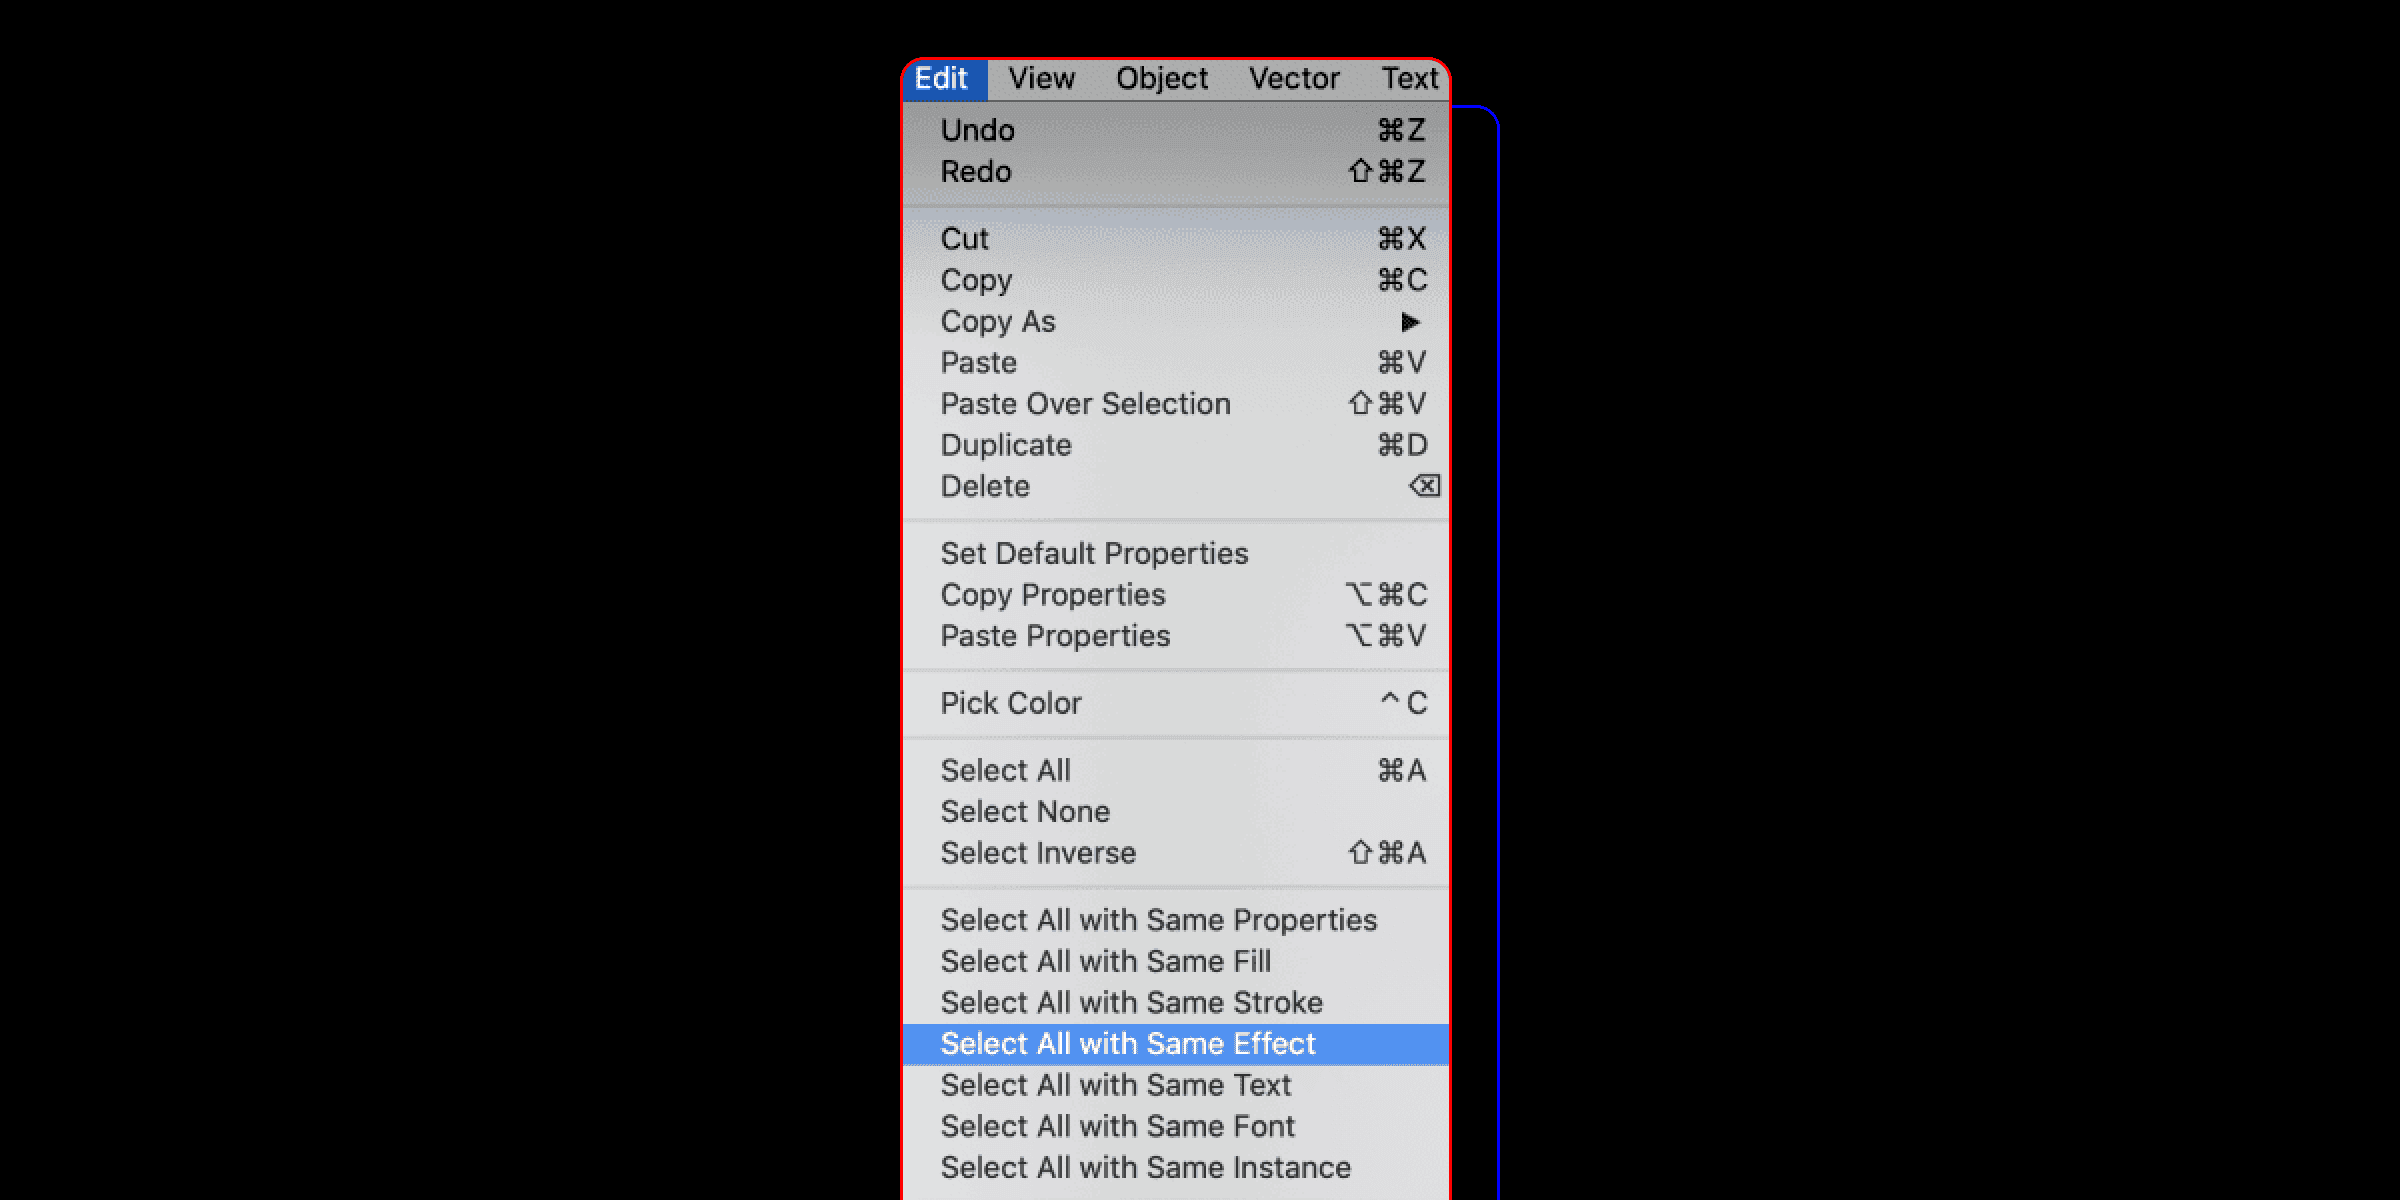
In just two clicks, you can find all elements with similar properties — fill, stroke, font, etc. Select an element, go to Edit > Select All with the Same…, and choose the property you want to match.
This is super helpful when you need to replace outdated colors, fonts, or swap component
instances.
You can also use this trick to move a master component to another file. How? Let’s talk about that next.
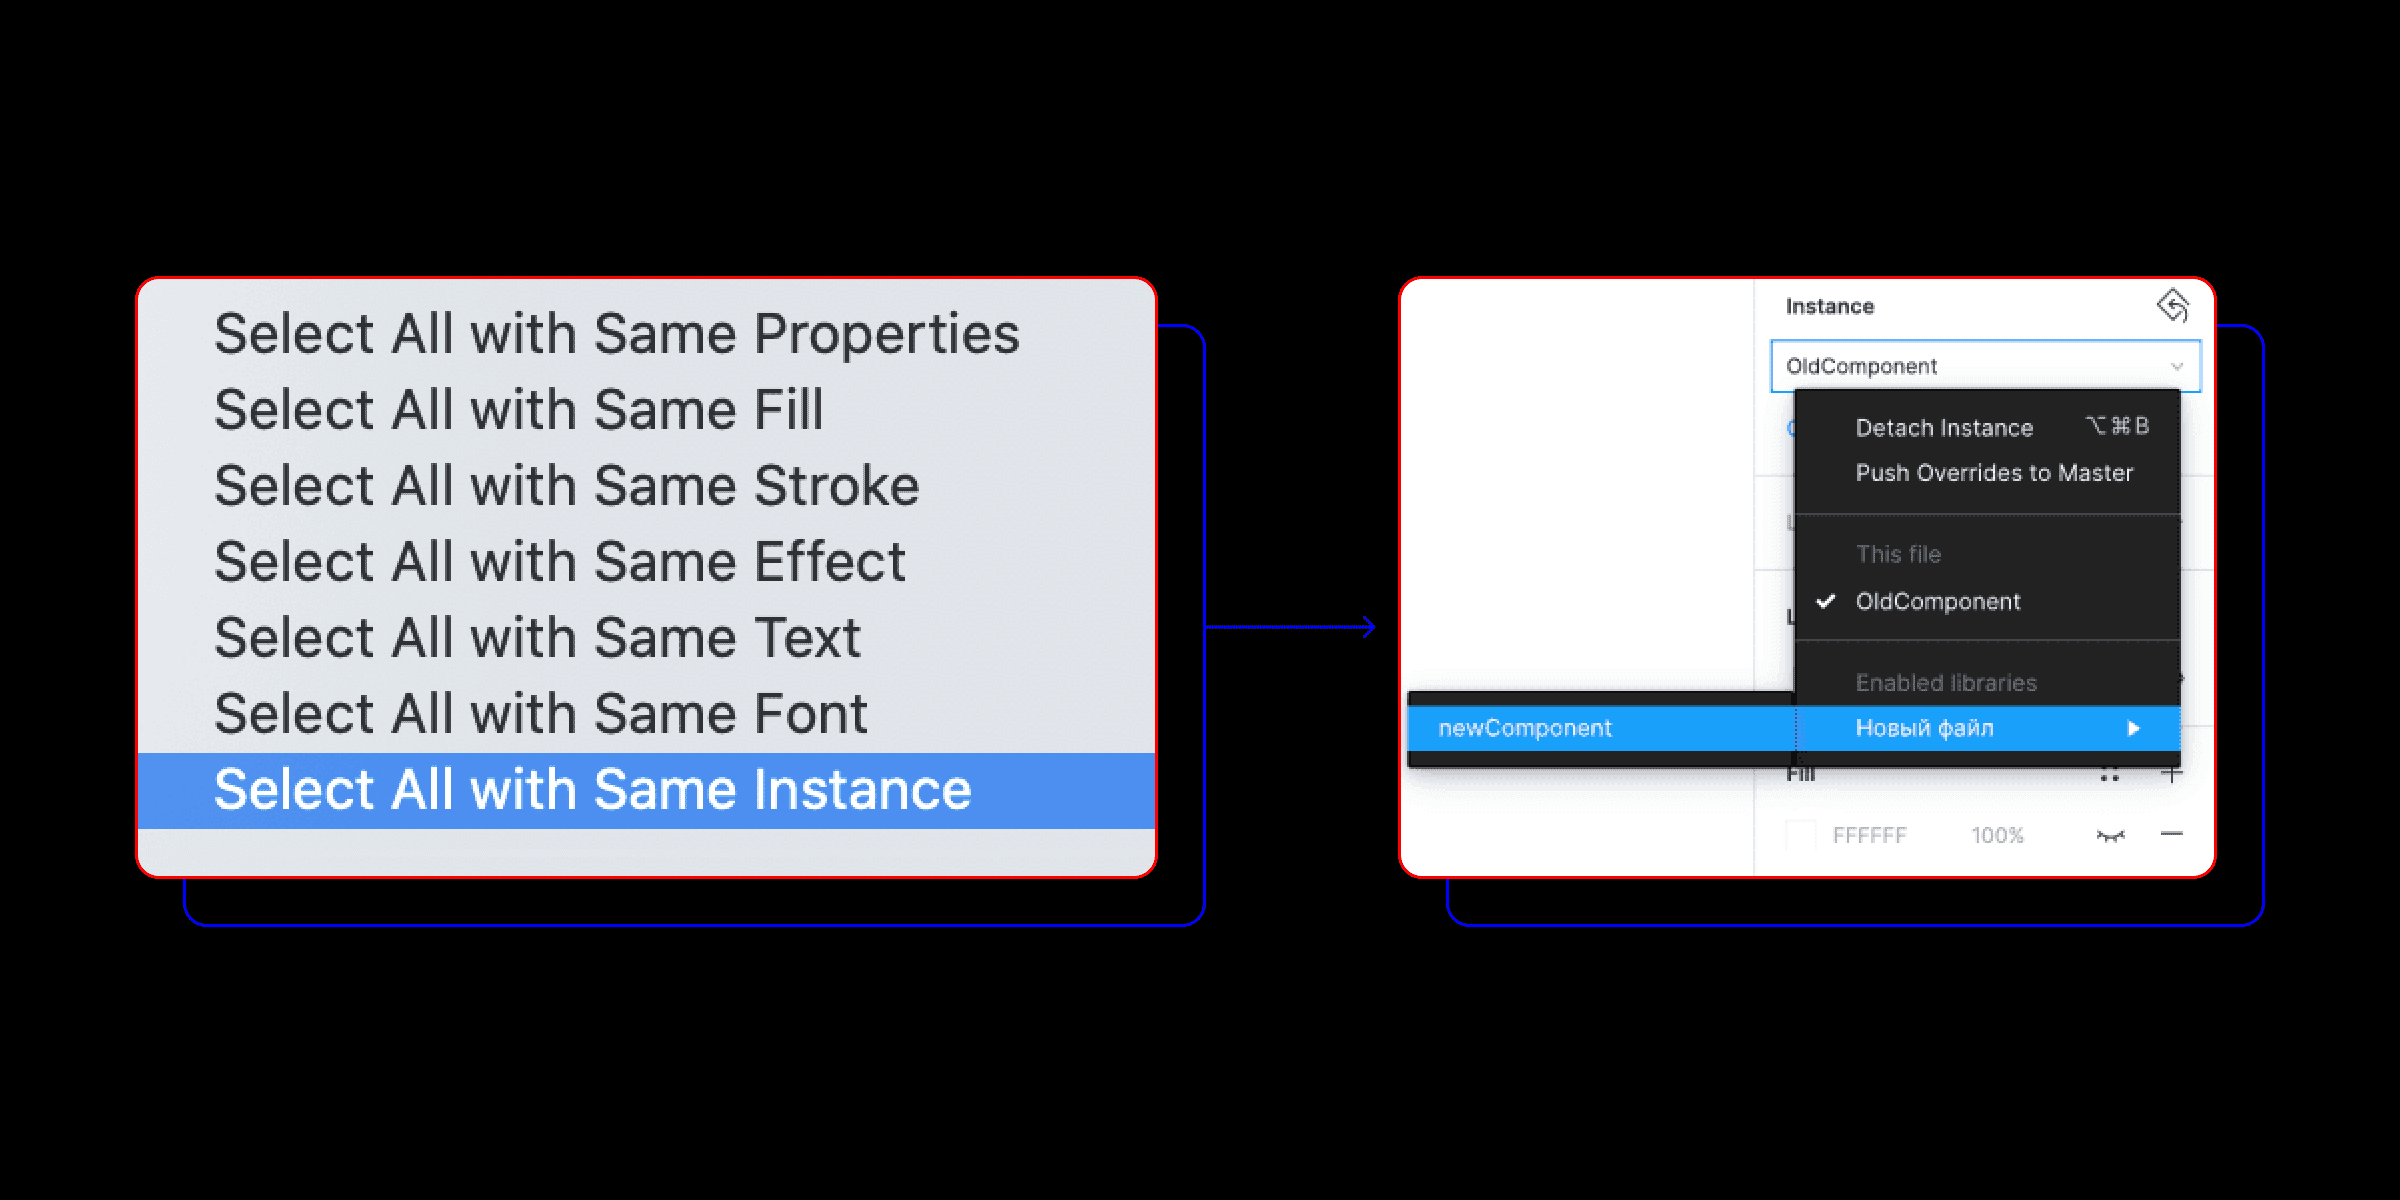
5. Move a Master Component to Another File
Figma doesn’t have a built-in option to transfer a used master component to another file — but there’s a reliable manual way to speed things up.
Here’s how:
- Copy the master component to the new file.
- Connect that new file as a library to your current one.
- Select any instance of the old master component.
- Go to Edit > Select All with the Same Instance.
- Use the Instance menu in the toolbar to replace the selected elements with the new component.
- Done! Now check the replaced instances for any broken text or style links. To keep texts intact during replacement, make sure text layers have identical names (see tip #2).
You can use the same approach to move color and text styles between files. For color styles, plugins like Style Organizer (or similar) will also help.
6. Turn Lists into Auto Layouts
If you turn a list into an Auto Layout, it becomes much easier to manage — you can duplicate rows with Cmd+D or delete items from the middle without breaking spacing.

7. Turn Everything into Auto Layouts
Familiar situation? 👇
All that can be fixed simply by wrapping those three elements in an Auto Layout.
Here are a few more examples:

A progress bar, for instance, can be made from an Auto Layout and invisible text. This method is especially useful when the progress bar lives inside a component, and you need to show multiple states without detaching it.
8. Stretch Auto Layouts
To make content inside your blocks adapt when resizing, set the Auto Layout parameter to Stretch Left & Right in the top toolbar.
9. Open More Than One Window in the Desktop App
Not everyone knows that you can open multiple windows in Figma’s desktop app. Just use the shortcut Cmd+Shift+N.
This is especially handy when you work on several files at once — say, iOS, Android, and a shared component library.
And by the way, we explain why large projects are better kept in separate files in another article.

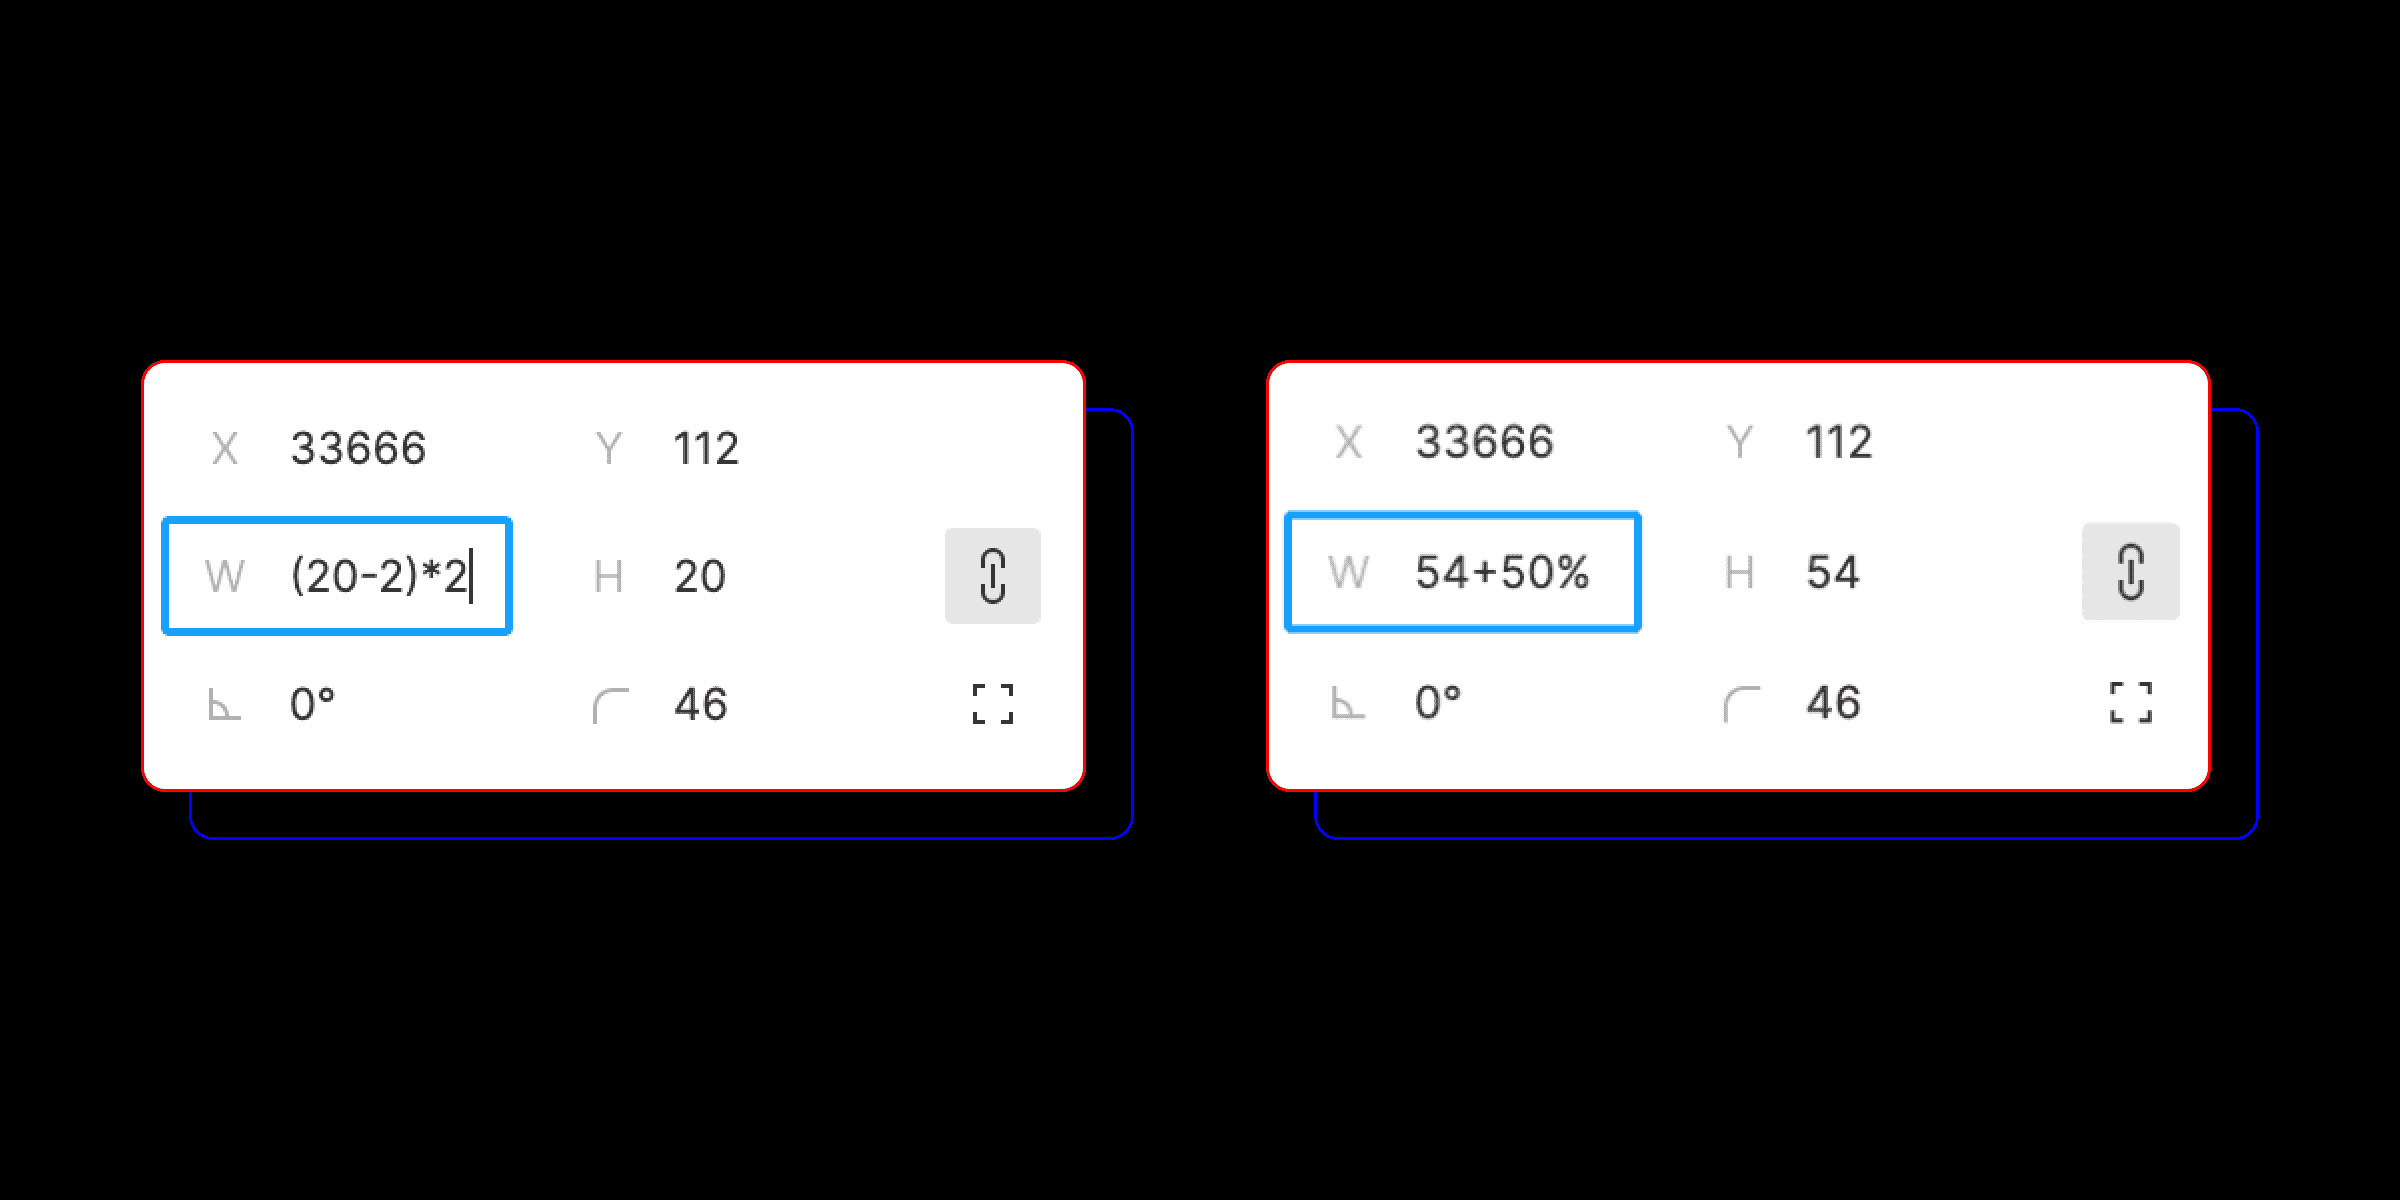
10. Stop Doing Math in Your Head
Fields that accept numeric values understand simple arithmetic. You can double an element’s width or add 50% — no calculator needed. It saves time and reduces mistakes in manual calculations.
We’ve adopted these simple rules at Mish — and the results exceeded expectations. Many tasks started moving much faster, and unified internal guidelines made it easy to switch designers between projects without losing time. Both our teammates and clients noticed the difference.


More articles
Previous article
Optimizing a Figma Project Using a Banking App as an Example
We’ll explain how we optimized and sped up large Figma files by three times. This effort was prompted by slow and sometimes unopenable files on the project team. The problem was particularly noticeable for team members with less powerful hardware: files were loading for five to ten minutes.

Next article
“Spider-Man: Across the Spider-Verse” as a Path to IT
One day, our Middle Developer Vitalik decided to rewatch Spider-Man and realized that the main character’s journey was remarkably similar to his own. The next day, he excitedly told us about it, and we asked him to write an article. So, why are IT specialists a kind of Spider-Man too?
